2Checkout
2Checkout, also known as 2CO is a global payment processor. Learn more about 2Checkout on their website at https://www.2checkout.com/.
Installing 2Checkout
To install the 2Checkout payment gateway, visit [Settings] > [Company] > [Payment Gateways] > Available, and click the "Install" button for 2Checkout.

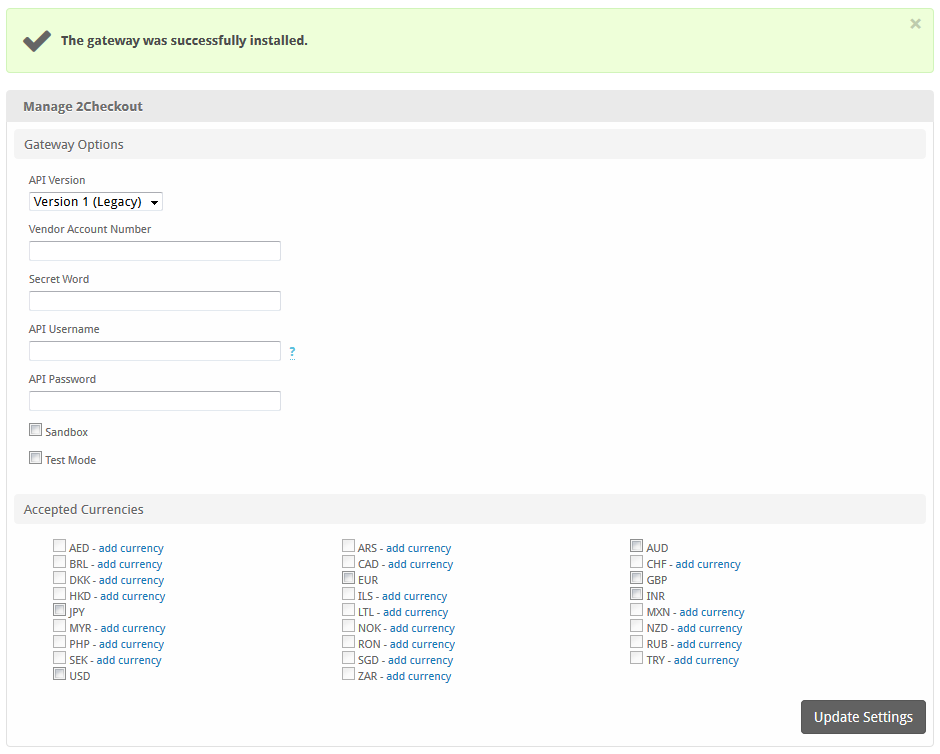
A message will be displayed, indicating that the payment gateway was successfully installed.

Enter the details provided by 2Checkout.
For Version 1
In order to use the sandbox, see the test data here https://www.2checkout.com/documentation/sandbox/test-data
| Field Name | Description |
|---|---|
| Vendor Account Number | Enter the Vendor Account Number provided by 2Checkout. |
| Secret Word | Enter the Secret Word provided by or configurable within 2Checkout. |
| API Username | Enter the API Username provided by or configurable within 2Checkout. It is required to process refunds. |
| API Password | Enter the API Password provided by or configurable within 2Checkout. It is required to process refunds. |
| Test Mode | Check to enable Test Mode. If checked, transactions will be processed in test mode and will not settle. |
| Sandbox | Whether to use the 2Checkout sandbox environment for payments and API calls |
| Accepted Currencies | Check the currencies that you would like to be processed through this payment gateway.The following currencies are available:AED, ARS, AUD, BRL, CAD, CHF, DKK, EUR, GBP, HKD, ILS, INR, JPY, LTL, MXN, MYR, NOK, NZD, PHP, RON, RUB, SEK, SGD, TRY, USD, ZAR |
For Version 5
In order to use the test mode, see the test data here https://knowledgecenter.2checkout.com/Documentation/09Test_ordering_system/01Test_payment_methods
| Field Name | Description |
|---|---|
| Merchant Code | Enter the Merchant Code provided by 2Checkout. |
| Buy Link Secret Word | Enter the Buy Link Secret Word provided by or configurable within 2Checkout. |
| Secret Key | Enter the Secret Key provided by 2Checkout. |
| Test Mode | Check to enable Test Mode. If checked, transactions will be processed in test mode and will not settle. |
| Accepted Currencies | Check the currencies that you would like to be processed through this payment gateway.The following currencies are available:AED, ARS, AUD, BRL, CAD, CHF, DKK, EUR, GBP, HKD, ILS, INR, JPY, LTL, MXN, MYR, NOK, NZD, PHP, RON, RUB, SEK, SGD, TRY, USD, ZAR |
When finished, click "Update Settings" to save the details. You have successfully installed and configured 2Checkout!
Common Issues
Transactions are not being created in Blesta after a client makes a 2Checkout payment.
Make sure 2Checkout's IPN is enabled. If it's not enabled, you will need to set a URL.
- Log into your 2Checkout account
- Go to Integrations then “IPN Settings”
- Click “Add IPN URL”
- Enter the IPN URL and hit “Add IPN”
- Scroll down to the "Response tags" section
- Make sure all of the following are checked: IPN_EXTERNAL_REFERENCE[], EXTERNAL_CUSTOMER_REFERENCE, IPN_PID[], IPN_PNAME[], IPN_DATE, IPN_TOTALGENERAL, CURRENCY, REFNO
- Click the "Update" button
The IPN URL will be something like https://yourdomain.com/blesta_directory/callback/gw/1/_2checkout where "1" is your company ID. If you do not have any addon companies, or don't know what that is, use "1".
For Blesta v5+ the IPN URL changes to https://yourdomain.com/blesta_directory/callback/gw/1/checkout2
2Checkout 3.3+ uses the sha2 or sha256 algo
Also make sure that you have this information set under the IPN tab within https://secure.2checkout.com/cpanel and NOT INS.