| Table of Contents |
|---|
Back Up Your Installation
Before attempting any upgrade or making any changes to your installation, you should always back up your files and database. If properly configured, Blesta can back up your database automatically, but you should perform a manual backup of everything before proceeding.
Upgrading from Blesta 2.5
If you are upgrading from Blesta version 2.5, please see Migrating to Blesta. Going from 2.5 to 3.0 requires a fresh installation of version 3, and running the importer.
Upgrading from 3.x to 4+?
Some files and directories were removed in version 4.0.0 that were present in 3.x which you may wish to remove when upgrading.
Upgrading
Watch the video or follow these steps to upgrade Blesta on your server.
1. Make sure you have valid Support & Updates.
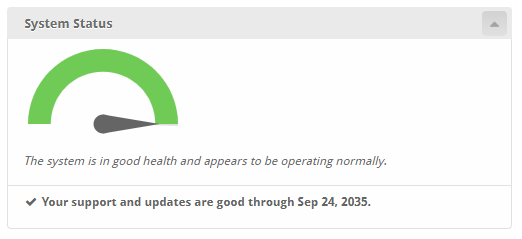
If you have an active monthly license, or a Blesta Owned Lifetime license, your Support & Updates are valid. If you have an Owned Branded or Owned Unbranded license, check the System Status widget on the Dashboard of your Blesta installation. It should show when your Support & Updates are good through. If they have expired, log into your account at https://account.blesta.com/client/login and click the Manage button next to your license, Addons on the left, and select and purchase Support & Updates.
2. Download Blesta
Visit https://account.blesta.com/ and click "Downloads", then click to download the latest version. The latest full version is also normally displayed on the home page of https://www.blesta.com.
3. Unzip the Archive
Unzip the Blesta archive (.zip) file using your favorite compression utility. On Windows, right click and select "Extract All". If the zip is uploaded to or downloaded directly to a Linux server, run the following in your shell:
unzip blesta-vx.x.x.zip
4. Upload Files & Launch Upgrader
Upload the contents of the blesta directory to your server where you installed Blesta overwriting your existing files and point your web browser to ~/admin/upgrade
Blesta may be upgraded in one of two ways:
- Click the link "Continue with Upgrade" to start the upgrader. OR
- In a shell, copy and run the command displayed, or cd to the directory you uploaded the contents of blesta, run the following command, and follow the directions to complete installation: php ./index.php admin/upgrade
Patching an existing install
Periodically we release patches that contain incremental changes to the installation files. Patches are released to address bugs or security vulnerabilities. A patch increments the last number in the version, for example 3.0.1, where the "1" is a patch from 3.0.0.
Follow these steps to apply an incremental patch.
1. Download the Patch
Visit https://account.blesta.com/client/plugin/download_manager/client_main/index/ and click "Patches", then click the patch for your release.
You may also download the full version, and continue in the same way. An incremental patch is included to make the process easier and prevent the necessity to overwrite all files.
2. Unzip the Archive
Unzip the Blesta archive (.zip) file using your favorite compression utility. On Windows, right click and select "Extract All". If the zip is uploaded to or downloaded directly to a Linux server, run the following in your shell:
unzip blesta-x.x.x-x.x.x.zip
3. Upload Files & Launch Upgrader
Upload the contents of the blesta directory to your server where you installed Blesta overwriting your existing files and point your web browser to ~/admin/upgrade.
Look in the footer for "Installed Version" to confirm that the patch was applied, and the new version is recognized.
That's it!
Failed Upgrade / Errors After Upgrade
If running /admin/upgrade does not complete all the database migrations, things may not work correctly and it may be necessary to modify a migration task so that it picks back up where it failed. The first step is to determine what the last completed migration version was. To find out, run this query:
SELECT `value` FROM `settings` WHERE `key`='database_version';
As an example, let's say this returns: 4.4.0-b1 but you uploaded the files for 4.6.0. Please note that there is not a direct correlation between the database version and the version of Blesta you are running. If your database says 4.4.0-b1 you could be running 4.4.2 if there were no database changes between 4.4.0-b1 and 4.4.2.
Next, look at the migration tasks in /components/upgrades/tasks/, you'll see files like this:
...
upgrade4_3_0_b1.php
upgrade4_4_0_b1.php
upgrade4_5_0_b1.php
upgrade4_6_0_b1.php
upgrade4_6_0.php
upgrade4_7_0_b1.php
...
The version in the filename corresponds to the version in your database. If your database shows 4.4.0-b1, then the last migration task it fully completed was upgrade4_4_0_b1.php. This means that when it tried to run the next migration, upgrade4_5_0_b1.php one of the tasks in that file failed. Errors that you are getting in your logs may help identify which task failed, but lets look at upgrade4_5_0_b1.php because we know something in that file failed. Edit the file in your favorite text editor, that will not modify the file encoding (UTF-8) or line endings. Look for the function tasks() and the methods listed within.
    public function tasks()
    {
        return [
            'addProxySetting',
            'updateInvoiceTerms',
            'addPackageNames',
            'addPackageDescriptions',
            'addPackageGroupNames',
            'addPackageGroupDescriptions',
        ];
    }
In the example above, we can see that the following tasks are run in order to upgrade to 4.5.0-b1:
- addProxySetting
- updateInvoiceTerms
- addPackageNames
- addPackageDescriptions
- addPackageGroupNames
- addPackageGroupDescriptions
If addProxySetting has already ran, then we can comment it out and run /admin/upgrade again in our browser. Then, check your database version again. If it's not at least 4.5.0-b1, then we may need to comment out the next task, updateInvoiceTerms and run /admin/upgrade again and check the database version again. Continue commenting out tasks ONE at a time and running /admin/upgrade until the upgrade is able to complete and shows the version of the most recent file in /components/upgrades/tasks/
Here's an example of a commented out task:
    public function tasks()
    {
        return [
            //'addProxySetting',
            'updateInvoiceTerms',
            'addPackageNames',
            'addPackageDescriptions',
            'addPackageGroupNames',
            'addPackageGroupDescriptions',
        ];
    }