| Table of Contents |
|---|
About Interworx
Interworx is a smart, scalable and reliable web hosting control panel and is becoming increasingly popular. Learn more about Interworx on their website at http://www.interworx.com/.
Supported Features
| Create | Cancel | Suspend | Unsuspend | Management | Config Options |
|---|---|---|---|---|---|
| YES | YES | YES | YES | YES | NO |
Management Features
This module supports the following management features within the client area:
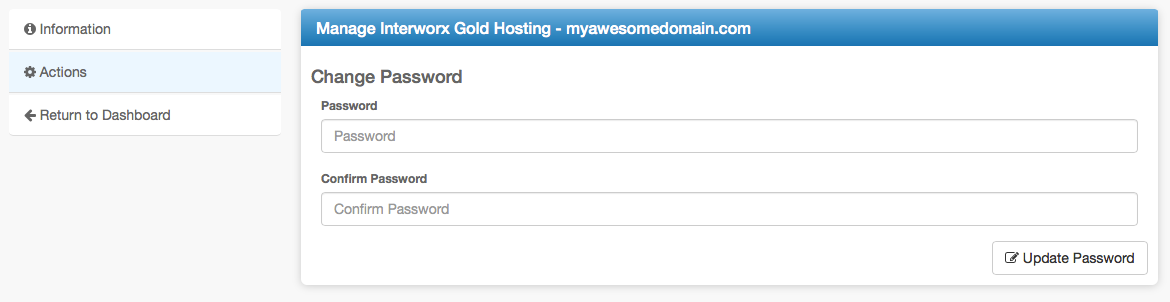
- Change Interworx Password
Installing Interworx
- Visit [Settings] > [Company] > [Modules] > Available.
- Click the "Install" button within the Interworx module listing.
When the module is installed, it should automatically load the "Manage" screen for the module. You can get back here any time by visiting [Settings] > [Company] > [Modules] > Installed and by clicking the "Manage" button for the module.
Interworx Overview
The "Manage" screen displays an overview of all of your Interworx servers and server groups, and lists all servers and server groups that are configured for Interworx.
Adding an Interworx Server
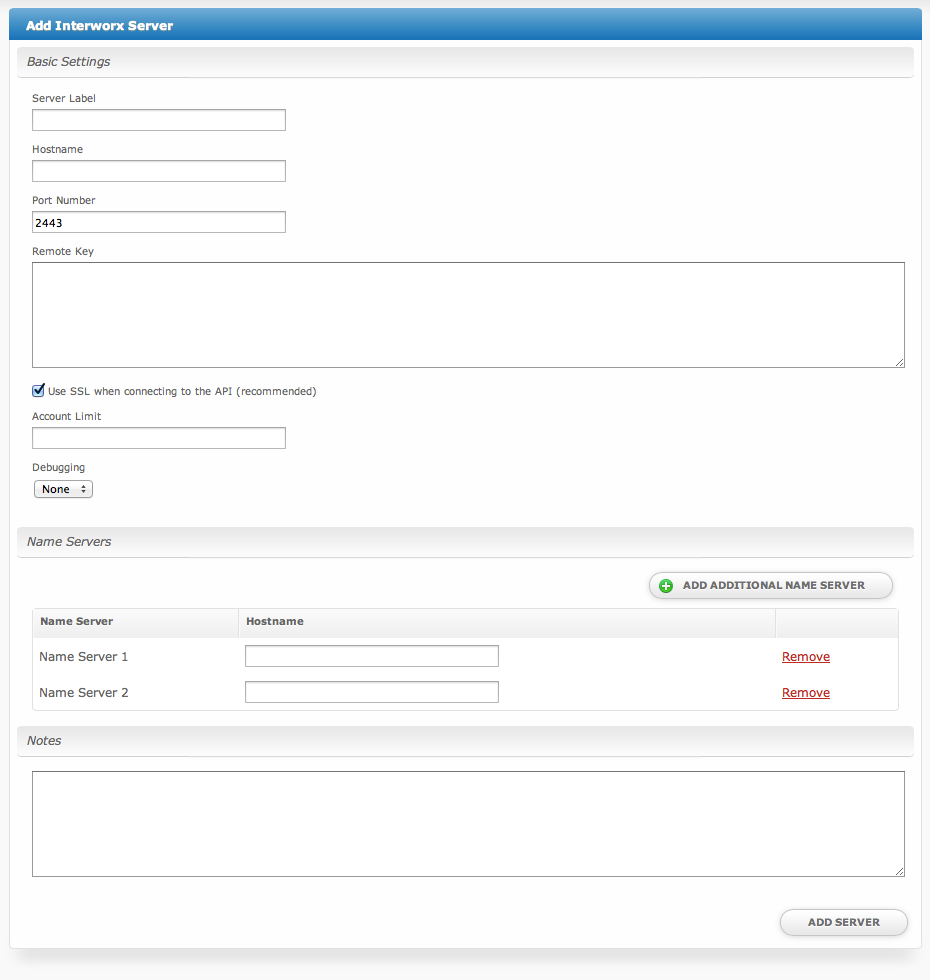
- From the "Manage" screen, click the "Add Server" button.
- Fill out the following options and click the "Add Server" button:
| Option | Details |
|---|---|
| Server Label | A friendly name for this server, i.e. "Server 1". |
| Hostname | The hostname of your Interworx Server, i.e. "server1.hostname.com". |
| Port Number | The port number of your Interworx Server (default 2443). |
| Remote Key | The remote key as provided within the Interworx control panel for API access. |
| Use SSL... | Select this option to send API requests over SSL (recommended). |
| Account Limit | The maximum number of Interworx accounts that should be created. Leave blank for unlimited. |
| Debugging | (Options: None, Log, Print) None is recommended. For debugging issues only, not for production use. |
| Name Servers | Enter the name servers that should be used, tags for these are included in the package welcome email. Any number of name servers may be added. |
| Notes | Any internal notes pertaining to this server. |
Adding a Server Group
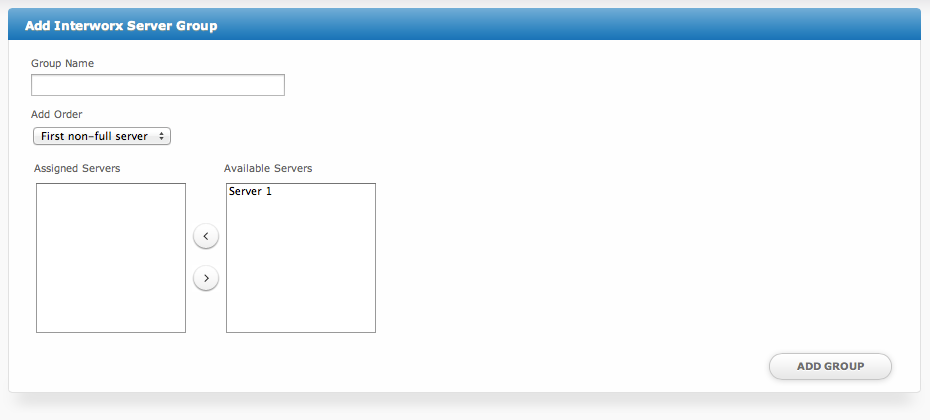
- From the "Manage" screen, click the "Add Server Group" button.
- Fill out the following options and click the "Add Group" button:
| Option | Details |
|---|---|
| Group Name | A friendly name for this server group. |
| Add Order | Choose how servers in this group will be selected for provisioning. |
| Assigned Servers | Select servers under "Available Servers" and click to move them to the left column to add them to the group. |
Welcome Email
When creating or editing a package that uses this module, the following tags will be available:
| Tags | Description | Notes |
|---|---|---|
| {module.host_name} | The host name of the server that the service was provisioned on | e.g. "domain.com" |
| {module.name_servers} | An array of available name servers for this module | Array elements must be looped over in the email template. See below for an example. |
| {module.notes} | The notes set on the module row | |
| {package.type} | The package meta type | i.e. "standard" or "reseller" |
| {package.package} | The Interworx package ID; represents the selected Interworx package name | e.g. "1" |
| {service.interworx_username} | The service field for the Interworx account username | |
| {service.interworx_password} | The service field for the Interworx account password | |
| {service.interworx_domain} | The service field for the Interworx domain | e.g. "domain.com" |
| {service.interworx_email} | The service field for the Inteworx email address |