...
| Table of Contents | ||||||||||
|---|---|---|---|---|---|---|---|---|---|---|
|
About Multicraft
Multicraft is a popular and widely used Minecraft server control panel. Learn more about Multicraft on their website at http://www.multicraft.org/.
Supported Features
| Create | Cancel | Suspend | Unsuspend | Management | Config Options | ||||||||||||||||||||||||||||||||||||
|---|---|---|---|---|---|---|---|---|---|---|---|---|---|---|---|---|---|---|---|---|---|---|---|---|---|---|---|---|---|---|---|---|---|---|---|---|---|---|---|---|---|
|
|
|
|
|
|
...
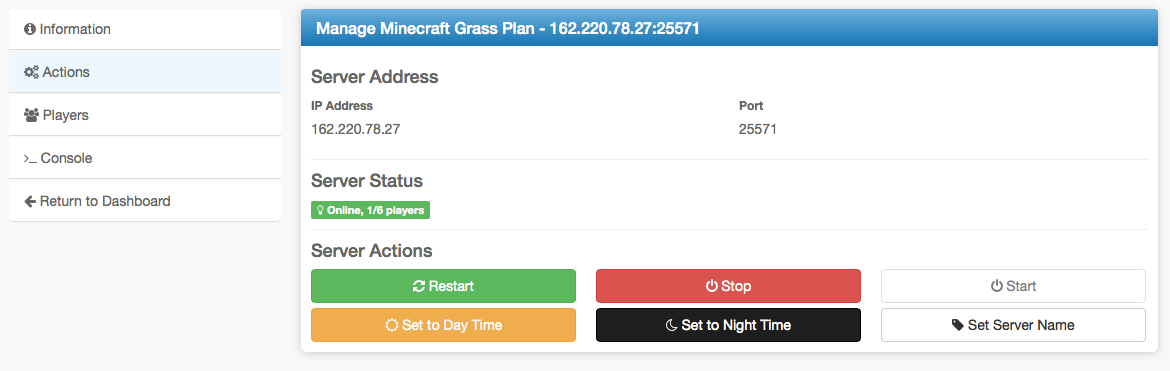
- View Server Status
- Restart Minecraft Server
- Stop Minecraft Server
- Start Minecraft Server
- Set Server to Day Time
- Set Server to Night Time
- Set Server Name
- View Connected Players
- Kick Players
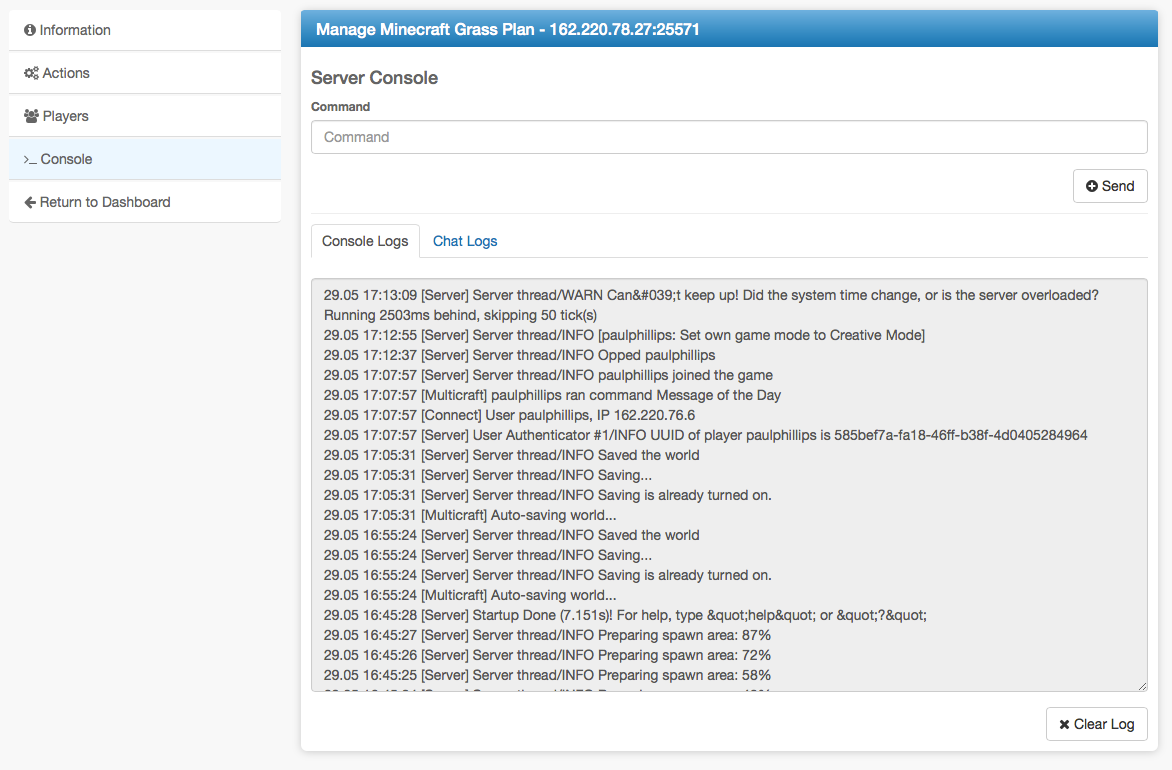
- Server Console
- Log in to Multicraft
| Expand | ||
|---|---|---|
| ||
|

Installing Multicraft
To install the Multicraft module, visit [Settings] > [Company] > [Modules] > Available, and click the "Install" button for Multicraft.
...
| Option Name | Possible Values | Recommended Field Type | Description |
|---|---|---|---|
| user_players | 0, 1 | Checkbox | Determines whether the owner can set the number of player slots themselves in Multicraft. 1 for yes. |
| players | integer >= 1 | Quantity, Dropdown | Sets the number of player slots, overriding the package value. |
| memory | integer >= 0 | Quantity, Dropdown | Sets the amount of memory for the server in MB (Megabytes), overriding the package value. |
| daemon_id | integer >= 1 (comma separated list accepted) | Dropdown | Sets the Daemon ID to use for the server, overrides the package value. Useful for offering servers in different locations, ie "Los Angeles", "Dallas", "Miami" which correlate to Daemon ID's in those locations. To add multiple Daemon ID's for the same location, separate them with a comma, ie "1,4,7". |
| dedicated_ip | 0, 1 | Checkbox | If 1, attempt to use one of the IP Addresses set for the module. If none are available, the server will default to the main IP. |
| jarfile | ??? | Dropdown | The jarfile to use for the Minecraft server. A value of "default" will use the default Minecraft server. Otherwise, enter the jar file name for the server, ie "craftbukkit.jar". |
...
To create a Configurable Option Group, visit [Packages] > Options, and click the "Create Group" button.
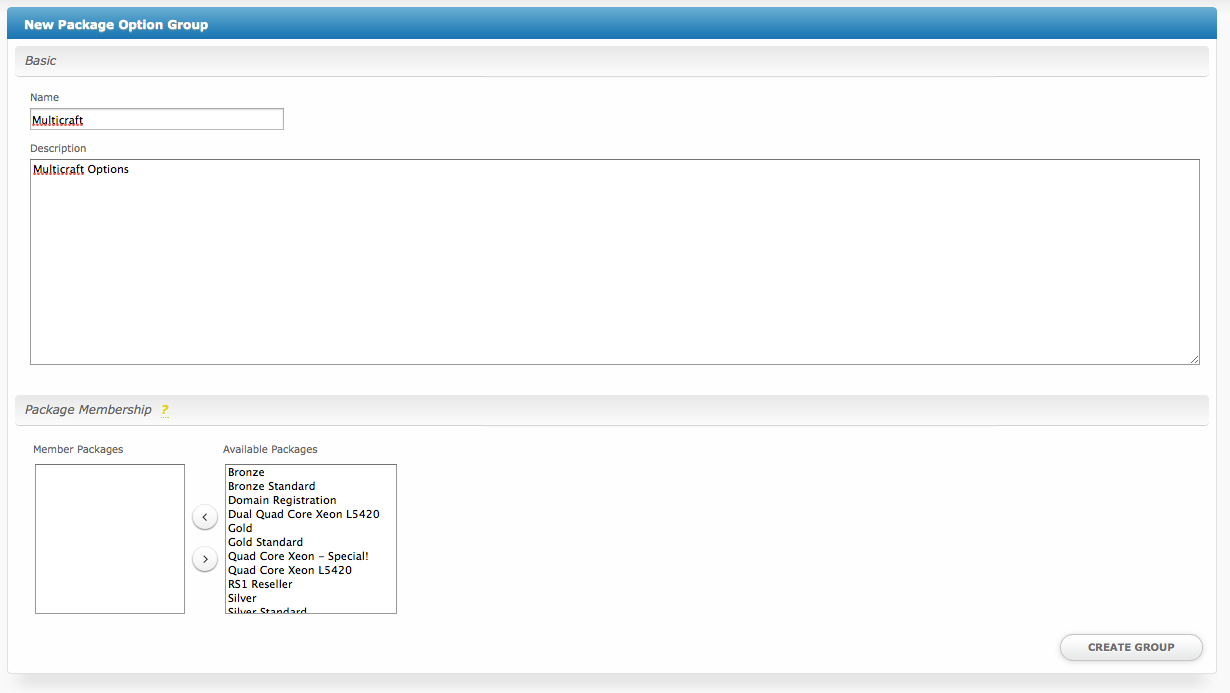
| Field Name | Description |
|---|---|
| Name | Enter a name for |
...
| this group. | |
| Description | Enter a description for this group (optional). |
| Package Membership | Leave this section blank, we will add the options to the group when creating the options instead. If you have already created the options, you may add them to the group |
...
| on this step. |
After filling out these options, click the "Create Group" button to create the Option Group.
Creating a Configurable Option
To create a Configurable Option, visit [Packages] > Options, and click the "Create Option" button.

| Field Name | Description |
|---|---|
| Label | Enter a |
...
| label, which will appear above or next to this form field. | |
| Name | Enter a |
...
| name, which is the form field name. (Important! This should match an Option Name described above. The module requires specific naming.) | |
| Type | Select the field type from "Checkbox", "Radio", "Drop-down", and "Quantity". |
| Options Section | Set pricing information within the Options section. The fields required here may vary depending on the "Type" selected above. |
| Group Membership Section | Add this Configurable Option to the previously created Option Group |
...
| by moving the Group from the right to the left in the |
...
| multi-select box |
...
| . |
...
After filling out these options, click the "Create Package Option" button to create the Option. Repeat as necessary to create all of the configurable options you wish to make available to the client during checkout.
Sample Configurable Options
The following are sample configurations for each of the supported configurable options listed above, and may serve as good examples for getting started.
| Option Name | Sample Configuration Screenshot (Click for full size) |
|---|---|
| user_players |  |
| players | 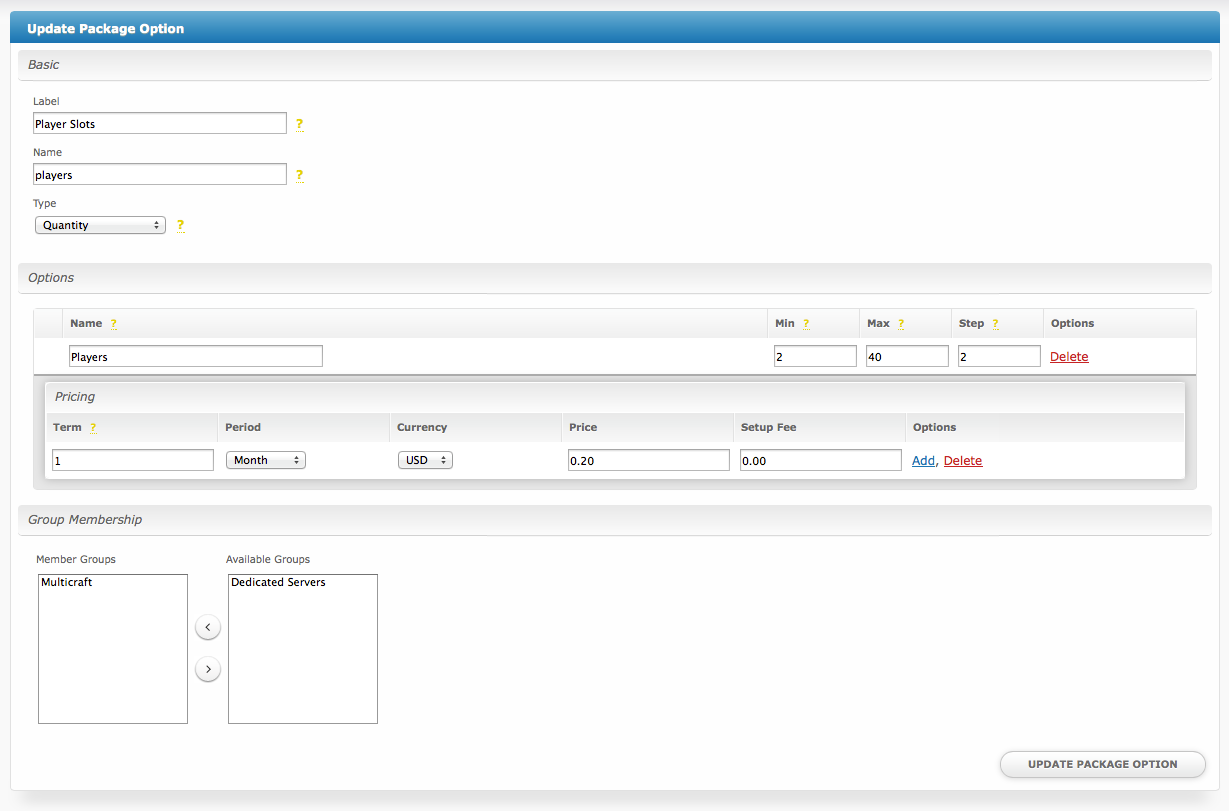 |
| memory | 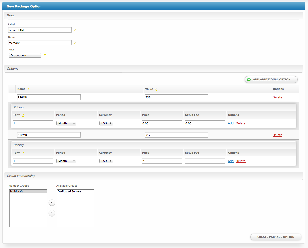 |
| daemon_id | 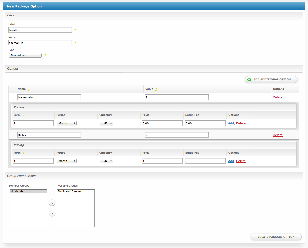 |
| dedicated_ip | 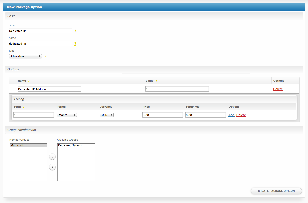 |
| jarfile | 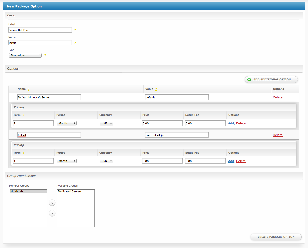 |
...
The Module Options section consists of the following options, which are specific to Multicraft specific:
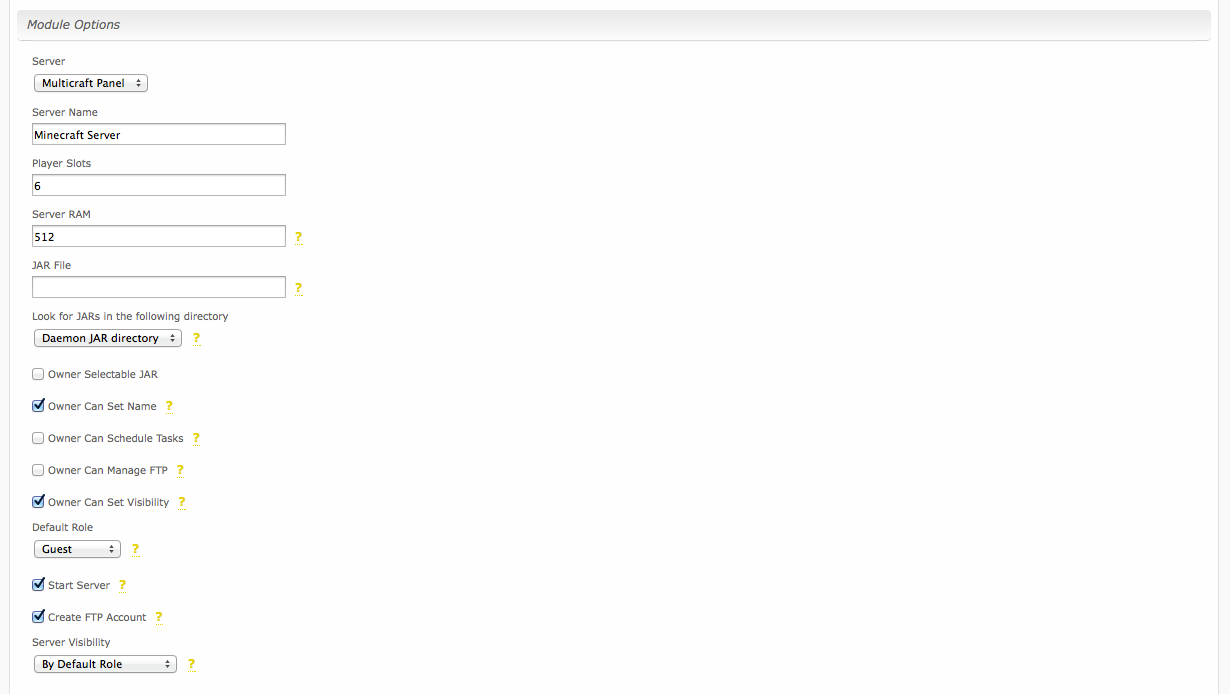
| Field Name | Description |
|---|---|
| Server | Select your Multicraft master server. |
| Server Name | Enter the default server name for Minecraft servers provisioned with this package. |
| Player Slots | Enter the number of player slots for this server. (Note that this can be overridden with a configurable option) |
| Server RAM | Enter the amount of memory to allocate to this server. (Note that this can be overridden with a configurable option) |
| JAR File | Enter the jar file to be used, leave blank to use the default. (Note that this can be overridden with a configurable option) |
| Look for JARs in the following directory | Select the location for where Multicraft will look for JARs. The Daemon JAR directory should be used if you are unsure. |
| Owner Selectable JAR | Allow the server owner to change the JAR. |
| Owner Can Set Name | Allow the server owner to set and change the server name. (Note! If selected, a text field will be displayed during checkout where clients may set the server name when ordered. Additionally, clients will be able to change the name from the client area.) |
| Owner Can Schedule Tasks | Allow the server owner to create scheduled tasks and change the autosave setting within Multicraft. |
| Owner Can Manage FTP | Allow the server owner to give FTP access to other users within Multicraft. |
| Owner Can Set Visibility | Allow the server owner to change the server visibility and the Default Role. |
| Default Role | Select which role players will be assigned when they first connect to the server. Use "No Access" for white-listing. |
| Start Server | Automatically starts the server when Multicraft restarts (recommended). |
| Create FTP Account | Automatically create an FTP account when the server is provisioned. |
| Server Visibility | Sets the visibility of the server in the Multicraft server list. |
Pricing

| Field Name | Description |
|---|---|
| Term | Enter the term for the desired pricing option. For example, if you wish to create a 3 month pricing option, enter 3 here. |
| Period | Select the period for this pricing option. "Day", "Week", "Month", "Year", and "One time" are options. The client will be invoiced every "term period", for example every 3 months if 3 is entered for term, and Month is selected for period. |
| Currency | Select the currency this pricing option is available for. |
| Price | Enter the price for this pricing option. |
| Setup Fee | If there is a setup fee, enter it here. |
| Cancellation Fee | If there is a fee to cancel early, enter it here. |
Click the "Add Additional Price" to add more pricing options. It's common for people to create 1 Month, 3 Month, 6 Month, and 1 Year price options. There are many possible combinations.
Welcome Email

The "Tags" section describes tags that may be used in the welcome email. The welcome email content is inserted into the "Service Creation" email template under [Settings] > [Company] > [Emails] > Service Creation. Only details unique to this service should be entered into the welcome email section for the package.
Sample Email
This sample email could be used in the Package Welcome Email section to help you get started. Be sure to enter content for your welcome email in both the HTML and Text sections.
| No Format |
|---|
Thanks for choosing us for your Minecraft Server!

Your server is now active and you can manage it through our client area by clicking the "Manage" button next to the server on your Dashboard.

Here are more details regarding your server:

Server Name: {service.multicraft_server_name}
Server Address: {service.multicraft_ip}:{service.multicraft_port}

You may also log into Multicraft to manage your server:

Multicraft URL: {module.panel_url}
User: {service.multicraft_login_username}
Pass: {service.multicraft_login_password}

Thank you for your business! |
Blesta creates the Multicraft login when the clients first Multicraft server is provisioned. On subsequent server purchases, the server is added to the existing Multicraft user. You can use the following code instead for the User and Pass, which will display it in the email only the first time. This will prevent emails from going out with blank credentials.
| Code Block |
|---|
{% if service.multicraft_login_username %}
Login with
User: {service.multicraft_login_username}
Pass: {service.multicraft_login_password}
{% else %}
Login using your existing Multicraft account credentials.
{% endif %} |
Group Membership
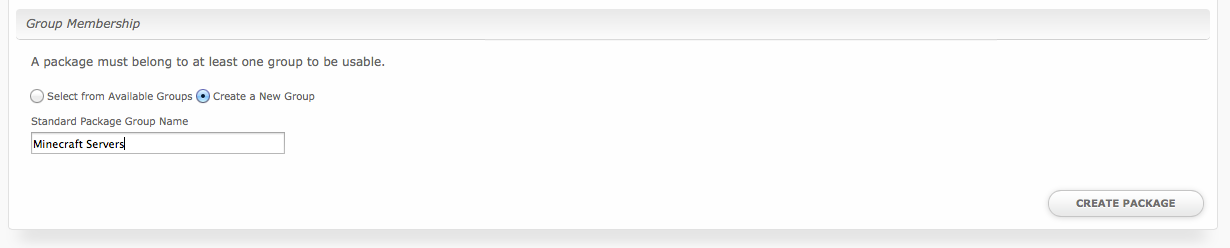
If this is the first Package you are creating with this module, select the "Create a New Group" option, and enter a Group name. If you are adding a subsequent Package and wish for it to be part of the same group, select "Select from Available Groups", and move the group from the right to the left of the multi-select box.
When finished, click "Create Package" to create this package.
Setting the Server IP
Before a Minecraft server can be started in Multicraft, proper Multicraft configuration is required. You may need to ensure your Multicraft configuration file (e.g. /home/minecraft/multicraft/multicraft.conf) has the correct IP address set. The home address (127.0.0.1) may need to be replaced with the server's IP address, and a password should be set.
| No Format |
|---|
ip = 162.56.29.34
password = my_password |
If the password is changed, the configuration file (e.g. /var/www/html/multicraft/protected/config/config.php) will need to be updated to reflect this change by setting the daemon_password to the same password set in multicraft.conf.
| No Format |
|---|
'daemon_password' => 'my_password', |
And finally, the Multicraft server must be restarted before these changes take effect.
| No Format |
|---|
/home/minecraft/multicraft/bin/multicraft -v stop
/home/minecraft/multicraft/bin/multicraft -v start |
The paths to Multicraft and the configuration files may vary.
Final Steps
The only thing left to do is to add this Package Group to an order form so clients may place orders for your Multicraft servers. See Creating an Order Form for more details.