| Table of Contents |
|---|
Supported Features
| Create | Cancel | Suspend | Unsuspend | Management | Config Options |
|---|---|---|---|---|---|
| YES | YES | YES | YES | YES | YES |
Management Features
This module supports the following management features within the client area:
- View Server Status
- Restart Minecraft Server
- Stop Minecraft Server
- Start Minecraft Server
- Set Server to Day Time
- Set Server to Night Time
- Set Server Name
- View Connected Players
- Kick Players
- Server Console
- Log in to Multicraft
Installing Multicraft
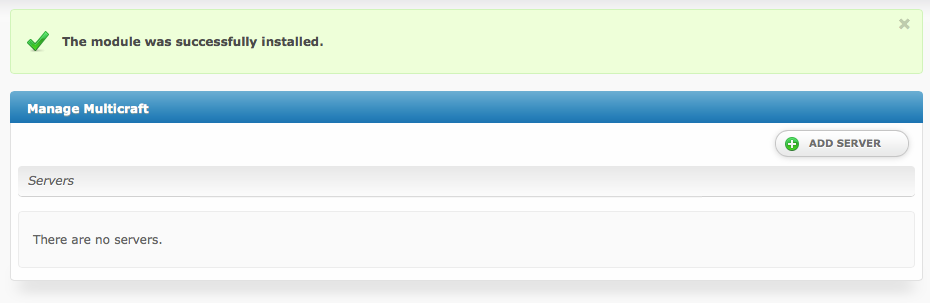
To install the Multicraft module, visit [Settings] > [Company] > [Modules] > Available, and click the "Install" button for Multicraft.

A message will be displayed, indicating that the module was successfully installed. Then click the "Add Server" button.
Enter the details for your Multicraft master server.
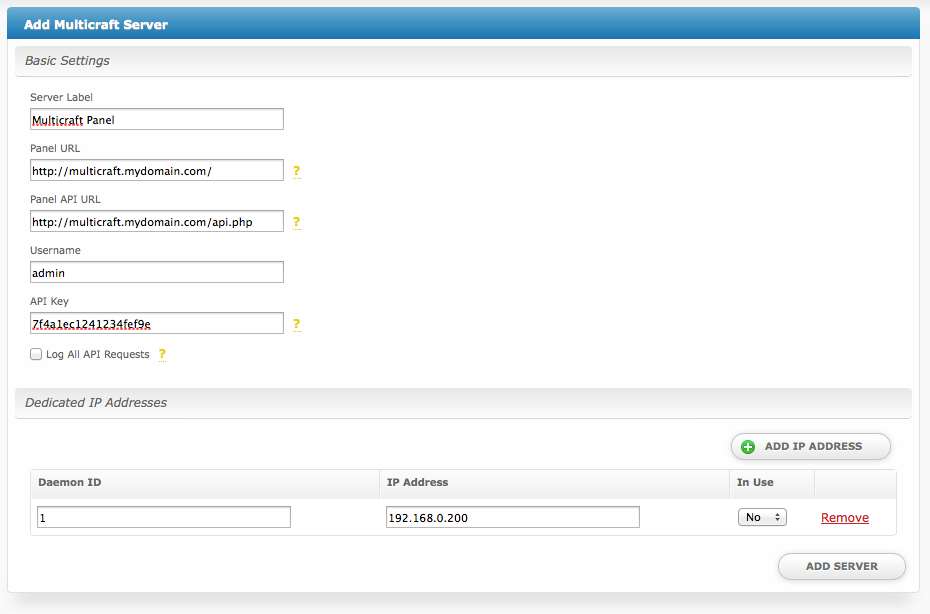
| Field Name | Description |
|---|---|
| Server Label | Enter a label for this Multicraft master server, it can be anything you like. |
| Panel URL | Enter the full URL to your Multicraft Panel, ie "http://multicraft.mydomain.com/". This is where you login. |
| Panel API URL | Enter the full path to your api.php, usually the Panel URL with /api.php appended, ie "http://multicraft.mydomain.com/api.php". |
| Username | Enter your Multicraft username. |
| API Key | Enter the API key for Multicraft. This can be found in Multicraft under Users, by clicking on your username. |
| Log All API Requests | It's recommended that this remain unchecked as management features make frequent API calls. Enable for debugging. |
| Dedicated IP Addresses | You can add dedicated IP addresses here (optional), just fill out the following
|
After filling out these options, click "Add Server" to add your Multicraft master server.
Most people will only have 1 Multicraft master server listed here. By specifying the Daemon ID via a configurable option, you can set which server Minecraft servers will be created on.
Configurable Options Overview
This module supports configurable options which may alter the provisioning of Minecraft servers. Configurable Options override Package settings.
Not Required
Configurable Options are not required, and this list in no way limits the Configurable Options that can be created. However, only the following Configurable Options can alter the way Minecraft servers are provisioned.
| Option Name | Possible Values | Recommended Field Type | Description |
|---|---|---|---|
| user_players | 0, 1 | Checkbox | Determines whether the owner can set the number of player slots themselves in Multicraft. 1 for yes. |
| players | integer >= 1 | Quantity, Dropdown | Sets the number of player slots, overriding the package value. |
| memory | integer >= 0 | Quantity, Dropdown | Sets the amount of memory for the server, overriding the package value. |
| daemon_id | integer >= 1 | Dropdown | Sets the Daemon ID to use for the server, overrides the package value. Useful for offering servers in different locations, ie "Los Angeles", "Dallas", "Miami" which correlate to Daemon ID's in those locations. |
| dedicated_ip | 0, 1 | Checkbox | If 1, attempt to use one of the IP Addresses set for the module. If none are available, the server will default to the main IP. |
| jarfile | ??? | Dropdown | The jarfile to use for the Minecraft server. A value of "default" will use the default Minecraft server. Otherwise, enter the jar file name for the server, ie "craftbukkit.jar". |
Creating Configurable Options
The following steps describe how to create configurable options. This section describes the following:
- Creating a Configurable Option Group
- Creating Configurable Options, and assigning them to the Group (repeat this step as necessary to create all Configurable Options required)
Creating an Option Group
To create a Configurable Option Group, visit [Packages] > Options, and click the "Create Group" button.
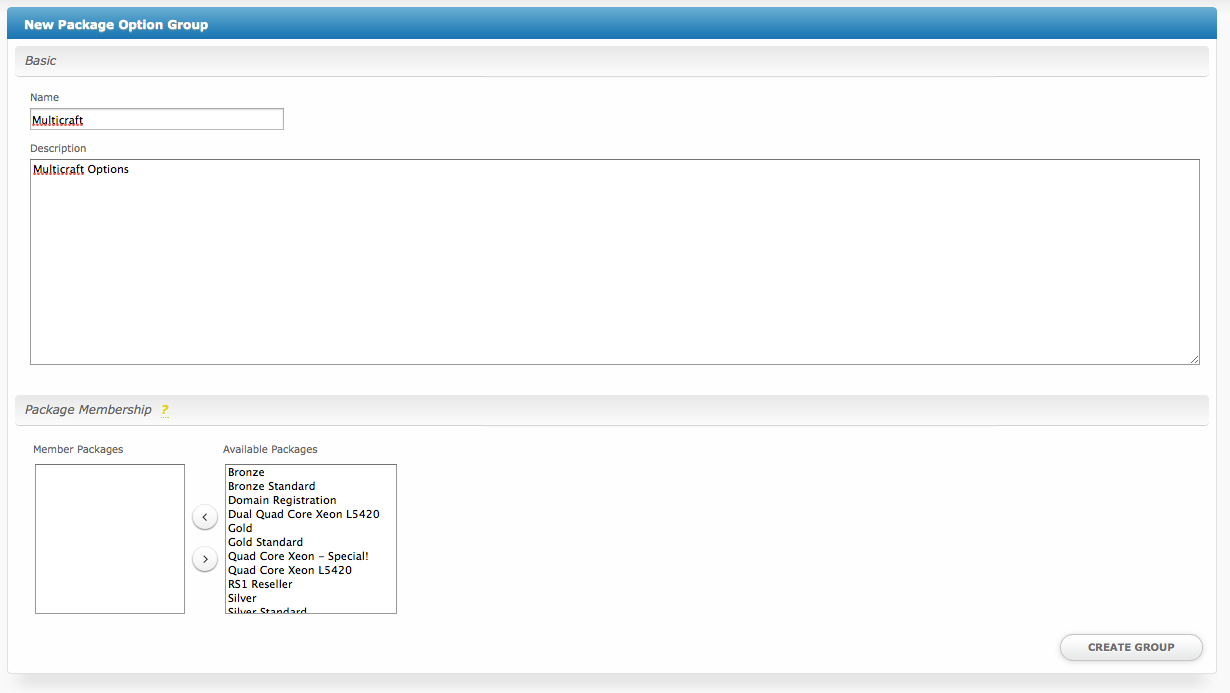
- Enter a name for the Group
- Enter a description for the group
- Click the "Create Group" button.
Creating a Configurable Option
To create a Configurable Option, visit [Packages] > Options, and click the "Create Option" button.
- Enter a Label name, which will appear above this form field.
- Enter a Name, which is the form field name. (Important! This should match an Option Name described above)
- Select the field type from "Checkbox", "Radio", "Drop-down", and "Quantity".
- Set pricing information within the Options section.
- Add this Configurable Option to the previously created Option Group, by moving the Group from the right to the left in the mult-select box under Group Membership.
- Click the "Create Package Option" button.
Sample Configurable Options
The following are sample configurations for each of the supported configurable options listed above.
| Option Name | Sample Configuration Screenshot (Click for full size) |
|---|---|
| user_players |  |
| players | 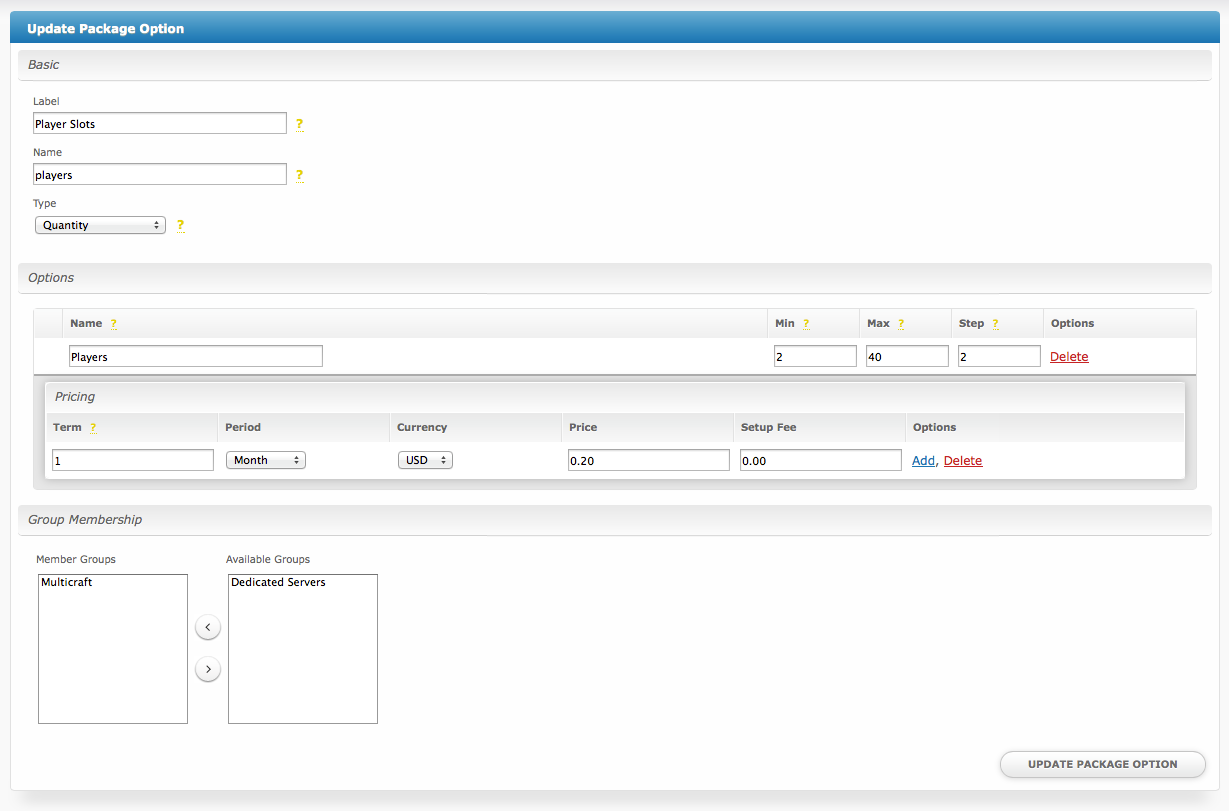 |
| memory |  |
| daemon_id |  |
| dedicated_ip |  |
| jarfile | 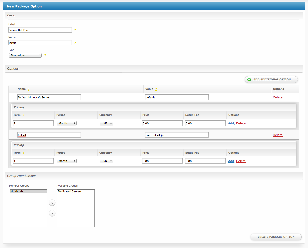 |