...
| Excerpt | ||
|---|---|---|
| ||
The cPanel & WHM software package is an easy-to-use control panel that gives web hosts, and the website owners they serve, the ability to quickly and easily manage their servers and websites. |
| Table of Contents | ||||||||||
|---|---|---|---|---|---|---|---|---|---|---|
|
About cPanel
cPanel/WHM is a popular and widely used web hosting control panel. Learn more about cPanel/WHM on their website at http://www.cpanel.net/.
Supported Features
| Create | Cancel | Suspend | Unsuspend | Management | Config Options | ||||||||||||||||||||||||||||||||||||
|---|---|---|---|---|---|---|---|---|---|---|---|---|---|---|---|---|---|---|---|---|---|---|---|---|---|---|---|---|---|---|---|---|---|---|---|---|---|---|---|---|---|
|
|
|
|
|
|
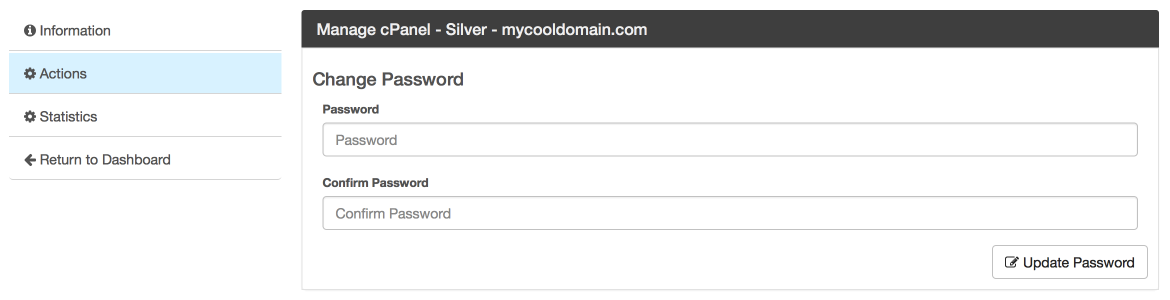
Management Features
This module supports the following management features within the client area:
- Change cPanel Password
- View Disk and Bandwidth usage
| Expand | ||
|---|---|---|
| ||
|

Installing cPanel
To install the cPanel module, visit [Settings] > [Company] > [Modules] > Available, and click the "Install" button for cPanel.
...
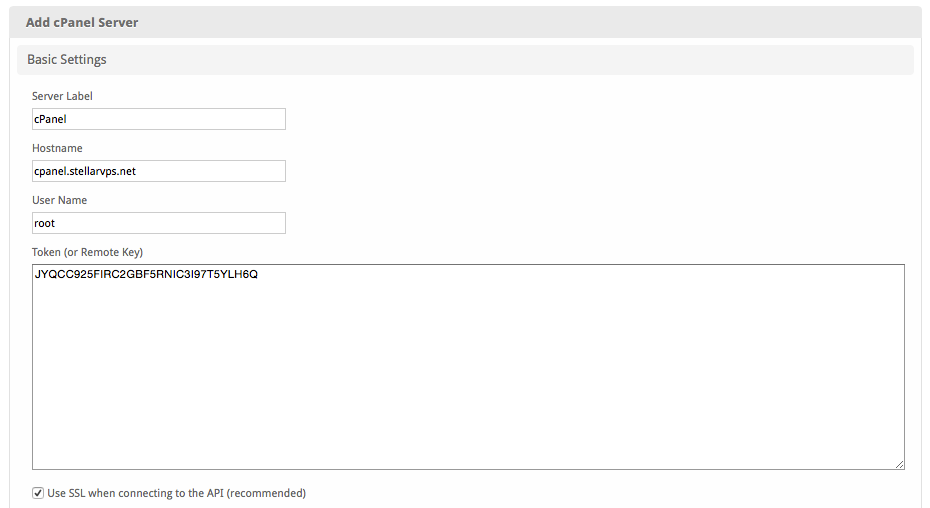
Enter the details for your cPanel/WHM server.
| Field Name | Description |
|---|---|
| Server Label | Enter a label for this cPanel/WHM server, it can be anything you like. |
| Hostname | Enter the FQDN hostname for your cPanel/WHM server, ie "server1.domain.com". |
| User Name | Enter your WHM username. This is the username you would log into WHM with. |
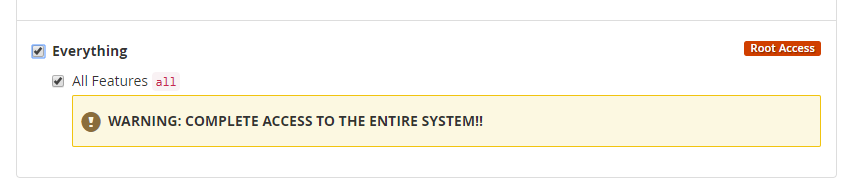
| Token (or Remote Key) | Enter your WHM server API token, found under "Manage API Tokens". You can also use a remote key found under "Setup Remote Access Key", but this is a deprecated authentication method. If using a token, you must select "Everything" if offering reseller accounts.
|
| Use SSL when connecting to the API | Check this option to use SSL for all API requests to your WHM server. This is highly recommended. |
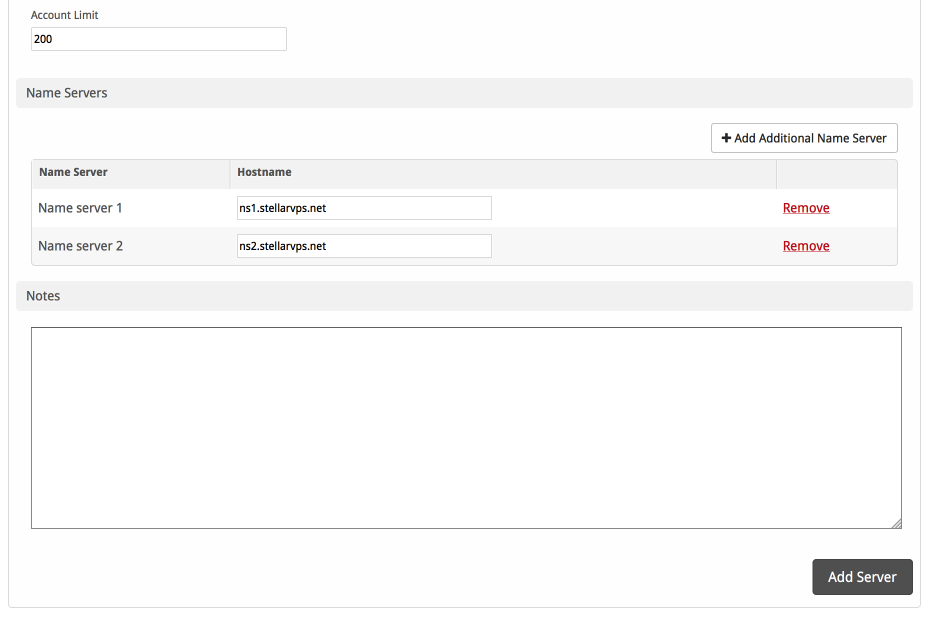
| Account Limit | Enter the maximum number of accounts that should be added to this cPanel/WHM server. |
| Name Servers | Enter the name servers that should be used for this server. These will be available to the package welcome email to the client. |
| Notes | Enter any notes that pertain to this server for future reference. |
After filling out these options, click "Add Server" to add your cPanel/WHM server.
...
To add a server group, from the cPanel overview at [Settings] > [Company] > [Modules] > cPanel, click "Add Server Group", then enter the details.
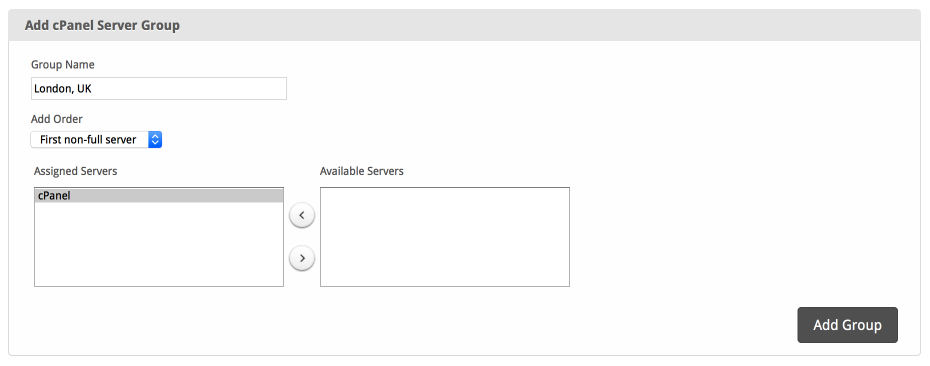
| Option | Details |
|---|---|
| Group Name | Enter the name for this server group. |
| Add Order | Choose how servers in this group will be selected for provisioning. Currently, first non-full server is the only add order. |
| Assigned Servers | Select servers under "Available Servers" and click to move them to the left column to add them to the group. |
Creating Packages
Packages define the pricing, welcome email, module and more. Packages can be assigned to Package Groups, and added to Order Forms. To create a Package, visit [Packages] > Browse, and click the "Create Package" button.
...
The Basic section consists of the following options:
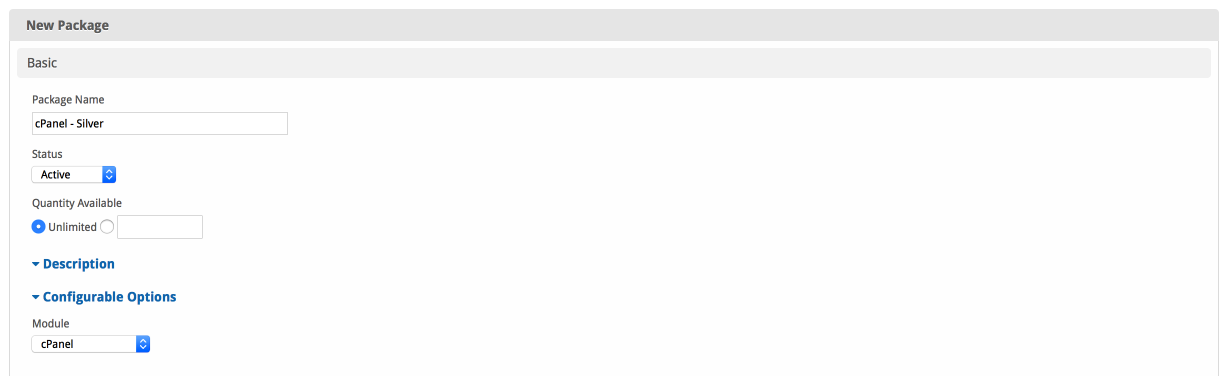
| Field Name | Description |
|---|---|
| Package Name | Enter the name of this Package, it will be visible wherever services are listed and on any order forms. |
| Status | "Active" is the default, "Inactive", and "Restricted" are also available. |
| Quantity Available | If this Package has a limited quantity available, enter the quantity, or leave it as "Unlimited". |
| Description | Enter a Description for this Package. HTML is allowed, and descriptions appear on order forms. |
| Configurable Options | A Configurable Option Group may be selected if previously created, but this module does not support configurable options during provisioning. |
| Module | Select "cPanel" for the module. |
Module Options
The Module Options section consists of the following options, which are specific to cPanel:
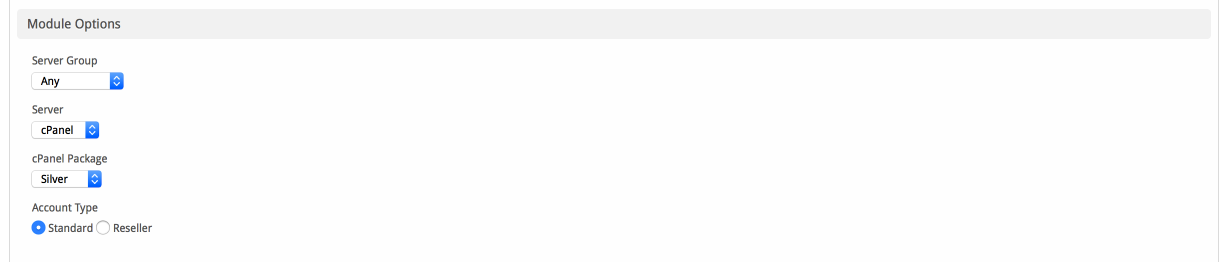
| Field Name | Description |
|---|---|
| Server Group | Select "Any" if you wish to specify a specific server, or select the Server Group to provision from. Selecting a group means that accounts will be provisioned from the group. Selecting a group is recommended. |
| Server | If "Any" is selected above, select the server this package will use to provision accounts. |
| cPanel Package | Select the cPanel Package to use when configuring accounts. These values are pulled from "Packages" created in WHM and specify resources for the plan |
| . | |
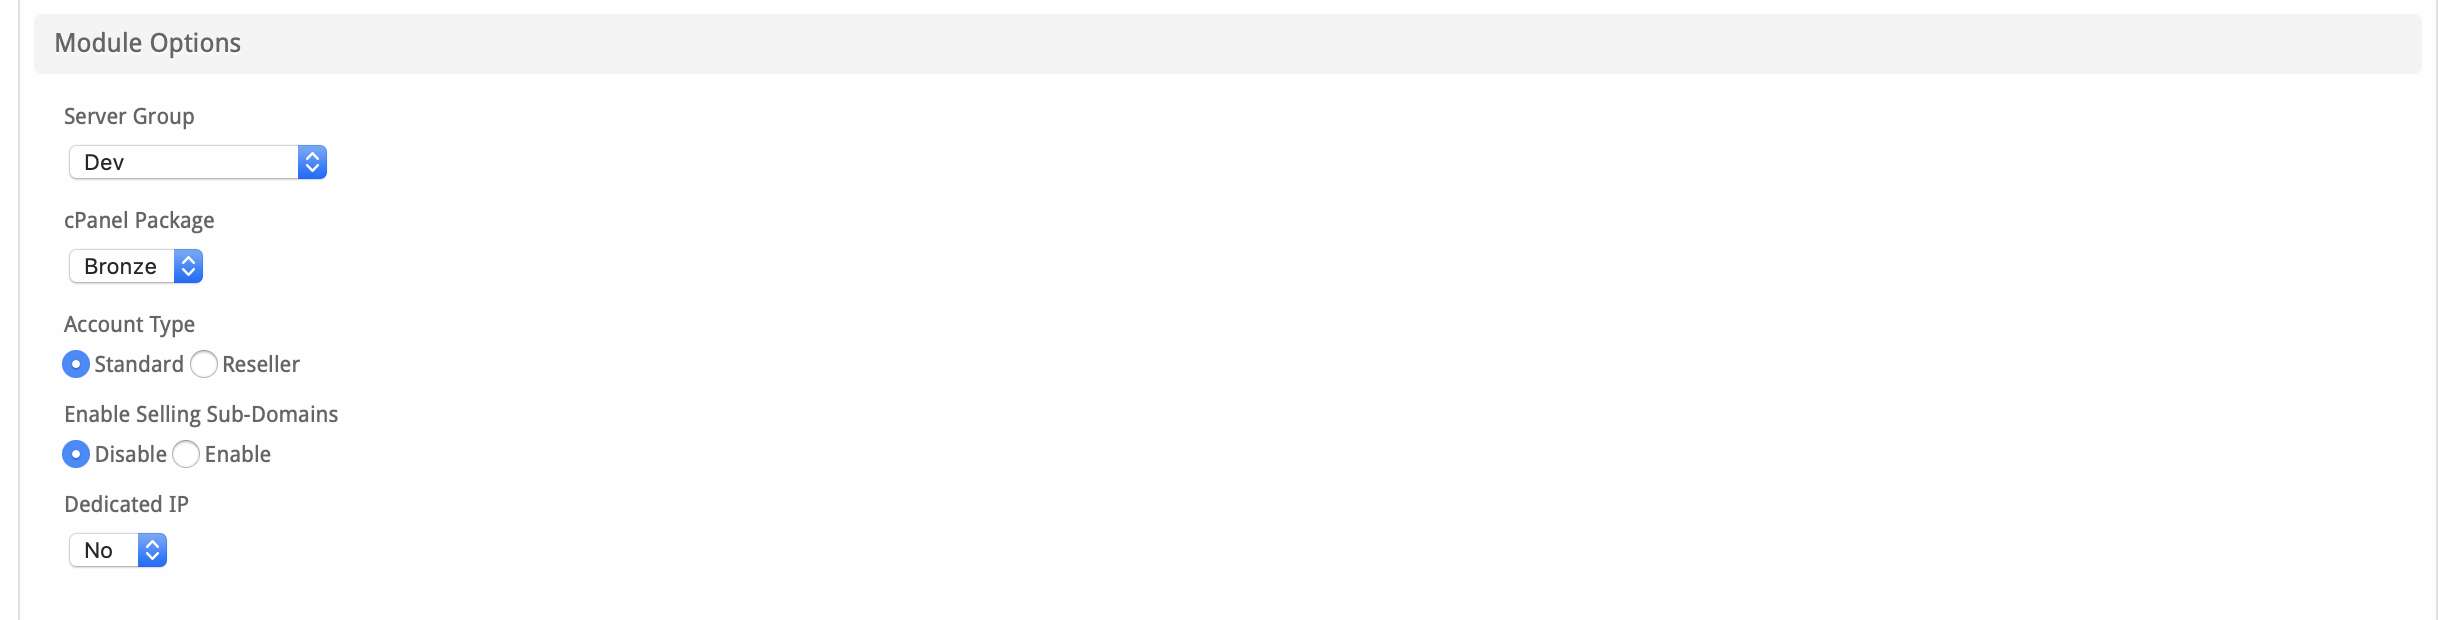
| Account Type | Select "Standard" if this is a standard cPanel account, or "Reseller" if it's a reseller account. If selecting Reseller, you'll be asked also to select an ACL as configured in WHM. As of Blesta 4.8, you may also set an "Account Limit", allowing the reseller to create up to this number of cPanel accounts. |
| Enable Selling Sub-Domains | As of Blesta version 4.8, it's possible to sell sub-domains under a predefined list of domains. Select "Enable" to enable selling of sub-domains, or "Disable" to allow the client to use their own domain. |
| Available Domains List | If "Enable" is selected for the option above, an input field will appear where a comma separate list of domains can be entered, from which the client will be able to choose from. e.g. domain1.com,domain2.com,domain3.com |
| Dedicated IP | As of Blesta 4.8, it's possible to include a dedicated IP address for accounts created with this package. Select "Yes" to include a dedicated IP |
| . |
Pricing
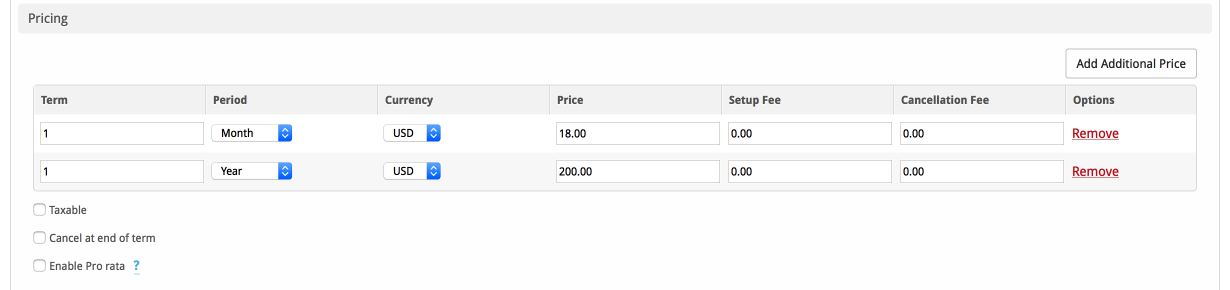
| Field Name | Description |
|---|---|
| Term | Enter the term for the desired pricing option. For example, if you wish to create a 3 month pricing option, enter 3 here. |
| Period | Select the period for this pricing option. "Day", "Week", "Month", "Year", and "One time" are options. The client will be invoiced every "term period", for example every 3 months if 3 is entered for term, and Month is selected for period. |
| Currency | Select the currency this pricing option is available for. |
| Price | Enter the price for this pricing option. |
| Setup Fee | If there is a setup fee, enter it here. |
| Cancellation Fee | If there is a fee to cancel early, enter it here. |
Click the "Add Additional Price" to add more pricing options. It's common for people to create 1 Month, 3 Month, 6 Month, and 1 Year price options. There are many possible combinations.
...
When creating or editing a package that uses this module, the following tags will be available:
| Tags | Description | Notes |
|---|---|---|
| {module.host_name} | The host name of the server that the service was provisioned on | e.g. "domain.com" |
| {module.name_servers} | An array of available name servers for this module | Array elements must be looped over in the email template. See below for an example. |
| {package.type} | The package meta type | e.g. "standard", "user", "reseller", etc. |
| {package.package} | The package meta package name | e.g. "Bronze" |
| {package.acl} | The package meta access control list |
| {service.cpanel_username} | The service field for the cPanel account username |
| {service.cpanel_password} | The service field for the cPanel account password |
| {service.cpanel_domain} | The service field for the cPanel domain | e.g. "domain.com" |
| Expand | |||||||||||||||||||||||||||
|---|---|---|---|---|---|---|---|---|---|---|---|---|---|---|---|---|---|---|---|---|---|---|---|---|---|---|---|
| |||||||||||||||||||||||||||
Due to the nature of tag objects containing several fields, many of which are likely irrelevant for use in email templates, but may be useful to you in certain circumstances, a dump of the tags are shown below.
|
...
- Go to the profile for the client you want to add the cPanel account to [Clients] > [Browse] and click on the client ID, or perform a search.
- Click Add Service under Account Actions on the left, or click the [+] button in the Services widget.
- Select the correct Package for the plan you are adding, and Continue.
- Select the Term, and uncheck the "Send order confirmation" and "Provision using the cPanel module" boxes. You may also wish to select "Do not Invoice" for Invoice method, but this will depend on whether you'd like to create an invoice now or not.
- Enter the domain name and click "Continue".
- The service should be added, now click the Manage icon next to the service on the client's profile page.
- Enter the correct username under the "Username" field, uncheck the "Use module" option, and save.
- If you need to sync the renew date to a specific day, click on the Manage link for the service again, and select "Change Renew Date" under the Actions drop down. Set the nex renew date, uncheck the "Prorate" option, and Save.
- Repeat for each account.
...