...
Field Name | Description |
|---|---|
| Server Group | Select "Any" if you wish to specify a specific server, or select the Server Group to provision from. Selecting a group means that accounts will be provisioned from the group. Selecting a group is recommended. |
| Server | If "Any" is selected above, select the server this package will use to provision accounts. |
| Account Type | Select "Standard" if this is a standard Interworx account, or "Reseller" if it's a reseller account. |
| Interworx Package | Select the Interworx Package to use when configuring accounts. These values are pulled from "Packages" under SiteWorx in Interworx, or "Packages" under Resellers in Interworx depending upon the Account Type selected above. |
Pricing
Welcome Email
Field Name | Description |
|---|---|
| Term | Enter the term for the desired pricing option. For example, if you wish to create a 3 month pricing option, enter 3 here. |
| Period | Select the period for this pricing option. "Day", "Week", "Month", "Year", and "One time" are options. The client will be invoiced every "term period", for example every 3 months if 3 is entered for term, and Month is selected for period. |
| Currency | Select the currency this pricing option is available for. |
| Price | Enter the price for this pricing option. |
| Setup Fee | If there is a setup fee, enter it here. |
| Cancellation Fee | If there is a fee to cancel early, enter it here. |
Click the "Add Additional Price" to add more pricing options. It's common for people to create 1 Month, 3 Month, 6 Month, and 1 Year price options. There are many possible combinations.
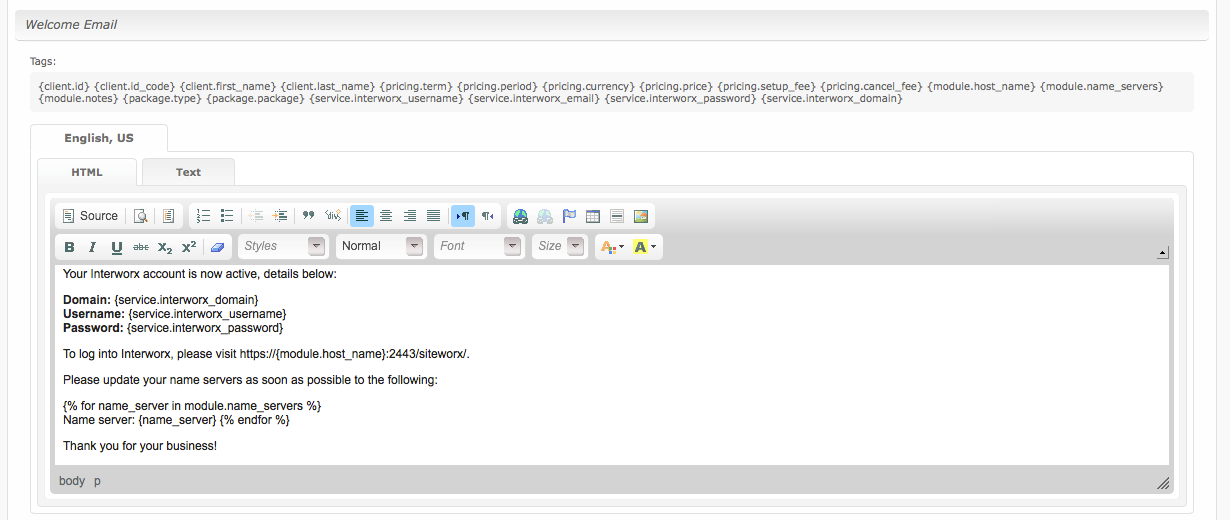
Welcome Email
The "Tags" section describes tags that may be used in the welcome email. The welcome email content is inserted into the "Service Creation" email template under [Settings] > [Company] > [Emails] > Service Creation. Only details unique to this service should be entered into the welcome email section for the package.
Sample Email
This sample email could be used in the Package Welcome Email section to help you get started. Be sure to enter content for your welcome email in both the HTML and Text sections.
| No Format |
|---|
Your Interworx account is now active, details below:

Domain: {service.interworx_domain}
Username: {service.interworx_username}
Password: {service.interworx_password}

To log into Interworx, please visit https://{module.host_name}:2443/siteworx/.

Please update your name servers as soon as possible to the following:

{% for name_server in module.name_servers %}
Name server: {name_server} {% endfor %}

Thank you for your business! |
When creating or editing a package that uses this module, the following tags will be available:
| Tags | Description | Notes |
|---|---|---|
| {module.host_name} | The host name of the server that the service was provisioned on | e.g. "domain.com" |
| {module.name_servers} | An array of available name servers for this module | Array elements must be looped over in the email template. See below for an example. |
| {module.notes} | The notes set on the module row | |
| {package.type} | The package meta type | ie.eg. "standard" or "reseller" |
| {package.package} | The Interworx package ID; represents the selected Interworx package name | e.g. "1" |
| {service.interworx_username} | The service field for the Interworx account username | |
| {service.interworx_password} | The service field for the Interworx account password | |
| {service.interworx_domain} | The service field for the Interworx domain | e.g. "domain.com" |
| {service.interworx_email} | The service field for the Inteworx email address |
Displaying Name Servers in the Welcome Email
The {module.name_servers} tag must be iterated over to display the name servers. Email tag usage is elaborated upon on the Customizing Emails page.
Consider an example where the module has two name servers set, named "ns1.domain.com" and "ns2.domain.com". The following can be added to the email template to output the name servers:
| Code Block |
|---|
{% for name_server in module.name_servers %}
Name server: {name_server}{% endfor %} |
The welcome email will display this as:
| Code Block |
|---|
Name server: ns1.domain.com
Name server: ns2.domain.com |
Group Membership
If this is the first Package you are creating with this module, select the "Create a New Group" option, and enter a Group name. If you are adding a subsequent Package and wish for it to be part of the same group, select "Select from Available Groups", and move the group from the right to the left of the multi-select box.
When finished, click "Create Package" to create this package.
Final Steps
The only thing left to do is to add this Package Group to an order form so clients may place orders for your Interworx servers. See Creating an Order Form for more details.


